There is a particular kind of frustration that belongs specifically to the experience of trying to paint a light color over a dark wall. You roll on the first coat and the dark color bleeds through so completely that the wall looks almost unchanged. You apply a second coat and it looks better — but the undertone of the old color is still visible, especially in the corners and along the edges where paint coverage is always thinnest. By the third coat you’re still seeing shadows, you’ve spent three times what you budgeted on paint, and the finish still doesn’t look the way it should. You start to wonder whether you bought the wrong product, whether your technique is off, or whether the previous color is simply impossible to cover.
None of those things are true. What’s actually happening is a chemistry and preparation problem that has a specific, reliable solution — and that solution doesn’t involve buying premium paint and applying it repeatedly until the old color gives up. It involves understanding why dark colors resist coverage, selecting the right primer for the specific transition you’re making, and executing the process in the right sequence. Done correctly, covering a dark wall color with a light one is a two-to-three coat job, not a five-coat marathon. Done without this knowledge, it can consume as many gallons as you’re willing to buy and still look wrong.
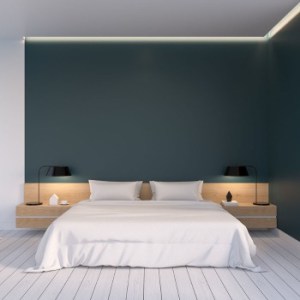
For Tyler, Lindale, Whitehouse, and Bullard homeowners tackling interior color changes — whether you’re refreshing a dark accent wall that felt dramatic five years ago, lightening a room that came with the house in a color you never chose, or brightening a whole home that a previous owner painted in deep, saturated tones throughout — here is the complete picture of what actually works when covering a dark interior wall.
Why Dark Colors Don’t Want to Be Covered
The reason dark paint colors resist coverage from lighter colors comes down to one fundamental property of pigment: darker colors have higher tinting strength. Tinting strength is a measure of how powerfully a pigment affects the color of whatever surface it’s on, and dark pigments — the carbon blacks, deep iron oxides, phthalocyanine blues and greens, and quinacridone reds that produce the deep colors in dark paint formulations — have dramatically higher tinting strength than the lighter pigments used in pale colors.
When you apply a light paint over a dark surface, the light paint’s pigment system is competing with the dark pigment that has already cured into the wall. Even though the dark color is covered by a wet coat of light paint, as that wet coat dries and becomes thinner, the high-tinting-strength dark pigments beneath it influence the appearance of the light film above. The dark undertone bleeds through not because the new paint is transparent in a simple sense, but because the optical depth of the dark pigment below registers through the lighter film above it in a way that neither more coats of light paint nor better technique fully resolves without addressing the underlying dark surface first.
This is why painting a light color directly over a dark one and expecting two coats to cover is consistently disappointing — you’re asking the topcoat to do a job it wasn’t designed to do without the foundation that makes that job achievable.
What Tinted Primer Does That Paint Alone Cannot
The solution to the dark-to-light transition problem is tinted primer — and understanding specifically how it works explains why it resolves in two coats what multiple topcoats alone cannot.
A primer’s function is fundamentally different from a topcoat’s function. Topcoat is formulated to deliver color accuracy, the correct sheen, and a durable, washable finish surface. Primer is formulated to create adhesion, seal the substrate, and provide a uniform foundation that topcoat can bond to and read accurately from. The hiding power in a quality primer — its ability to block the substrate color beneath it — is typically higher than the hiding power in standard topcoat, because primers use higher concentrations of titanium dioxide, the white pigment responsible for opacity in paint, than most finish formulations do.
When a tinted primer is applied over a dark wall, the primer’s high titanium dioxide content creates a dense, opaque film that blocks the dark pigment from reading through, and the tint color in the primer brings the foundation color partway toward the destination color. The result is that when topcoat goes on over a properly tinted primer, it is reading from a surface that is already close to its target color rather than from a surface that is fighting its way from dark to light. Two topcoats over that prepared foundation deliver the uniform, accurate color result that six coats directly over the original dark surface would struggle to achieve.
How to Choose the Right Tint for the Primer
The tinting strategy for primer depends on the specific color transition being made. For a direct dark-to-light transition — a navy blue wall going to a warm white, or a deep charcoal going to a pale sage — the most effective approach is to have the primer tinted to a midpoint color between the existing dark color and the new destination color. If you’re going from a deep navy to a soft cream, a medium gray primer sits between those two endpoints and provides a neutral foundation that neither the dark navy nor the warm cream needs to fight against.
Most paint stores can tint primer to any color in their fan deck, and many professional painters use a color specifically matched to the midpoint of their transition rather than a standard gray. Ask the paint counter to tint your primer to a color approximately halfway between your old color and your new one — they have the equipment and color matching tools to execute this accurately. The additional cost of tinting the primer is measured in dollars. The cost of the extra gallons of topcoat and labor time that skipping this step produces is measured in significantly more.
For extremely dark colors — the deepest blacks, darkest navies, and most saturated deep reds that some East Texas homeowners have encountered in homes they’ve purchased — a shellac-based primer may outperform a latex primer in blocking power. Shellac primers seal aggressively and block bleed-through from highly saturated dark pigments more effectively than latex formulations, though they require mineral spirits for cleanup and have a stronger application odor. In a room with a particularly stubborn dark color that standard tinted primer hasn’t fully resolved, a shellac prime coat followed by a tinted latex prime coat and then two topcoats produces the most reliable result.
The East Texas Complication: Humidity, Drying Time, and What Rushing Costs You
In East Texas, where the air from June through September can carry humidity levels that slow interior paint drying significantly, the multi-coat sequence required for dark-to-light transitions has a specific timing discipline attached to it that matters more here than in drier markets.
Each coat in the sequence — primer, first topcoat, second topcoat — needs to reach a genuine dry-to-recoat condition before the next coat goes on. The recoat window is printed on every paint can and is calibrated for moderate temperature and humidity conditions. On a humid July day in Tyler, when indoor humidity is elevated even with air conditioning running, that window extends beyond what the can specifies. Paint that is touched and feels dry to the skin may still have moisture trapped in the film that hasn’t fully evaporated — and applying a second coat over that trapped moisture creates a condition where the new coat seals in the moisture below it, leading to bubbling, poor adhesion, and an uneven finish that reveals itself as the moisture eventually works its way out.
The practical guidance for East Texas homeowners doing dark-to-light repaints is to add at least an hour to every recoat interval specified on the product label during humid summer conditions, and to run a ceiling fan or portable fan in the room during drying periods to promote air circulation and moisture evaporation. Patience at the drying stage costs nothing and saves you from discovering that the wall looks different in two separate sections based on where you recoated before adequate drying had occurred.
Sheen Selection When You’re Covering Dark Colors
One detail that homeowners making major color transitions often overlook is sheen selection, specifically the interaction between sheen level and the visibility of remaining dark undertones. Higher-sheen finishes — satin and semi-gloss — create a more reflective surface that makes any residual dark undertone slightly more visible under raking light than the same coverage level on an eggshell or flat finish. This happens because the reflective surface creates stronger contrast between areas of complete coverage and any spots of incomplete coverage.
For dark-to-light transitions, using an eggshell finish on the first topcoat and reserving satin for the final coat — or simply using eggshell throughout on walls — provides more optical forgiveness during the coverage-building phase. If your destination color and room use call for satin, apply it as the final coat over a foundation that has already achieved complete opacity. Applying satin as the first topcoat over an imperfectly covered dark surface maximizes the visibility of any remaining bleed-through.
When Skim Coating Makes More Sense Than Multiple Coats
In situations where the existing dark color has also been applied with a heavy texture — thick roller texture, skip trowel, or multiple built-up layers — and you’re making a significant color change, there is a point at which skim coating the walls with a thin layer of joint compound before priming becomes the more cost-effective approach than additional primer and topcoat cycles.
Skim coating creates a completely fresh, neutral surface that has no color history and no texture variation from previous paint buildup. It requires skill to execute smoothly, which makes it a professional technique rather than a typical DIY approach, but in rooms where the existing finish is heavily textured and the color change is dramatic, the cost of professional skim coating can be offset by the reduction in material and labor involved in fighting a stubborn dark color through paint alone. This is worth discussing with your painting contractor before committing to an approach, particularly in older Tyler and Lindale homes where multiple decades of paint layers have accumulated on drywall surfaces that were never designed to carry that much film weight.
Let Quality Coats Handle the Dark-to-Light Transition the Right Way
Covering a dark wall color without burning through gallons of paint and multiple unnecessary trips back to the store requires knowing exactly which preparation steps to take, which primer products to specify, and how to sequence the coats for your specific room’s conditions. At Quality Coats Painting, we’ve helped homeowners throughout Tyler, Lindale, Whitehouse, Flint, and Bullard make dramatic interior color transformations that come out right in two or three coats because we build the preparation and priming foundation that makes those coats actually work. If you have dark walls that need to go light — or any interior painting project where you want it done correctly the first time — contact our team today and let’s give your home the transformation it deserves.